When your bank accounts are connected, all transactions are recorded in Asora under Datahub > Financial > Bank Statements. Unlike custodial accounts, which include detailed asset information, bank accounts only provide settlement details.
On Asora, it is possible to assign transaction types and subtypes to the bank statement entries and link them to accounts, assets and owners. Once linked, they will feed into the performance calculations of of the linked assets based on the transaction types assigned.
Follow the steps below to link a bank statement entry to an account/asset and assign it a type and subtype:
- Open the transaction card from Bank statements.
- Click on the three dots on the top right corner of the card and click on 'Edit'.
- Change the Type and Subtype by clicking and selecting a suitable option from the dropdown.
- Copy the settlement amount and paste it into the Net Amount field.
- Search for the asset to be linked in the 'Asset name' field.
- The settlement amount can also be copied into the Units field as it is a mandatory field to be populated.
- Click on Save.
The video below shows the process in detail:
It is also possible to use the in-line or multi edit functionality to edit the bank statement entries in bulk.
In-line edit
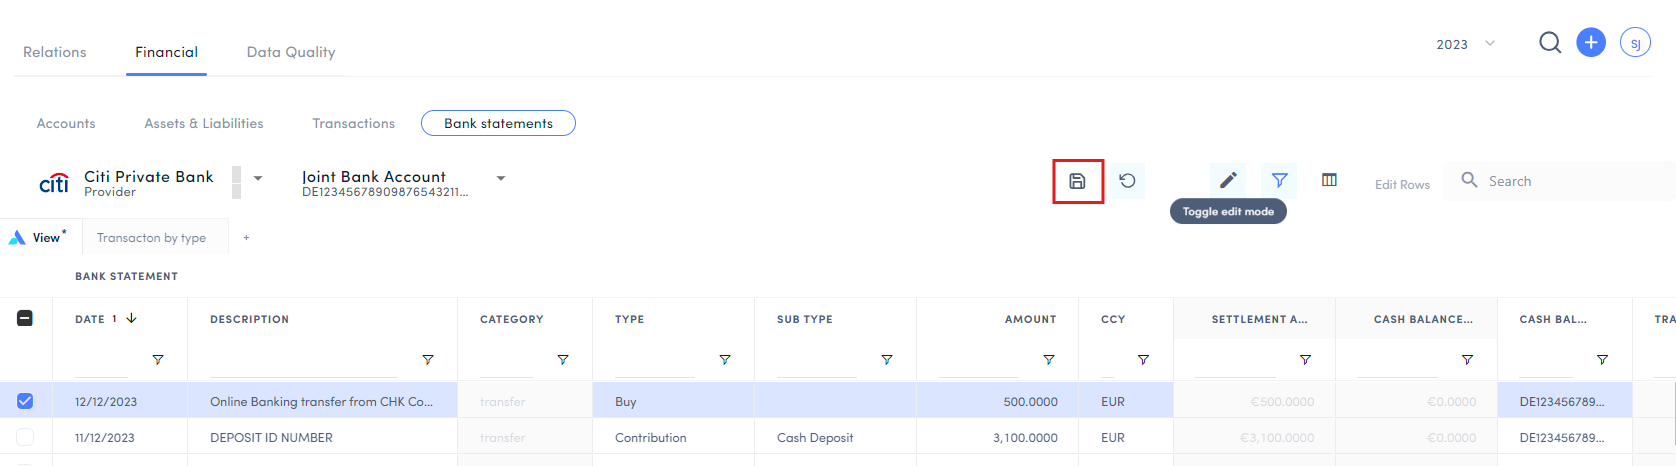
To enable in-line edit, click on the pencil icon on the top right corner of the table, highlighted below:
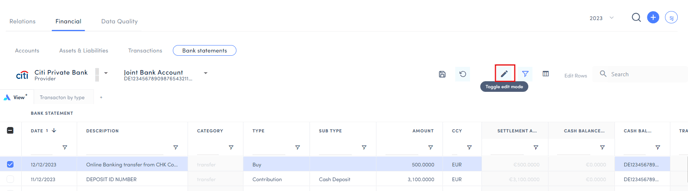
This puts the table in edit mode while greying out the fields that can't be edited in this mode. To edit the transaction type, for example, double click on the existing option. This will show you the other types that you can choose from. You can add in other columns to your table view to edit them.
Once you have made the edits, click on the save icon that appears on the top of the table to save your changes.
Multi-edit
To edit multiple entries at once, select the individual rows by clicking on the check boxes which appear as the first column on the table.

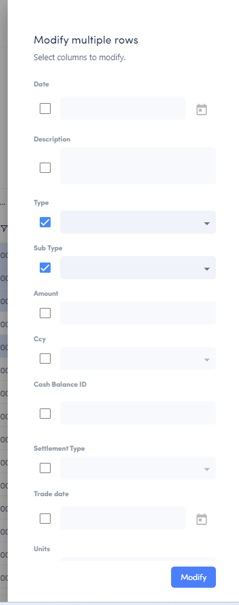
Once selected, click on 'Edit Rows' at the top right corner of the table.

This will open up a list of fields that can be edited for the selected transactions. Select the fields you wish to edit, make the edits, and click on Save.